When using Designs you can select pages from the Built in Designs, or from custom designs that you have created. Both types of designs are available from the Design Selection Dialog.
The custom design directory is specified in the Preferences Dialog. It can be placed anywhere that is convenient to use. Changing locations will not change files, so you can have different design selections that can be switched between if that is helpful.
Files in the designs directory are models, with any additional files (graphics, data and so on) put in directories with the model name and then _graphics and so on. This prevents additional files with the same name from different models conflicting.
If you want to move a model out of the designs directory you should also move all of the associated folders (you can also use the Export as Bundle command on the File Menu to make sure everything is included).
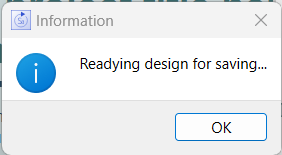
When you save a model in the custom designs directory it will do extra steps to prepare thumbnails for use in the Design Selection Dialog. These steps can take some time, so Stella will put up a notification:
The notification will close when the saving has been completed. This process happens each time you save.
Just open the models in the custom designs folder and edit them as you would any interface. When you save, the design will be updated.
To customize a built-in design click the Customize button on the Design Selection Dialog. When you save that for the first time you will be able to select a model name. You can use the existing name (it will appear prefixed with Custom in the Design Selection Dialog) or modify the name to represent the way you intend to customize it (for example Deluxe Prev-Next Brown Orange).
To use an existing interface as a design simply save it into the custom designs directory you specify in the Preferences Dialog. When you save it, the design thumbnails for display in the Design Selection Dialog will be created.
If are working with models that have similar variable names, then using a design from one such model will make it easier to directly use the design pages without having to redo all of the variable connections to input and output objects. In this case the design model should have all input and output objects attached to variables. Where the variable names match, the attachment will carry over the model the design pages are used in.
You can share all of your custom designes by zipping your custom design folder and giving it to someone else. If you want to share only a single custom design, open the model in Stella, use Export as Bundle command on the File Menu to create a zip file and sent that to whomever you want to share with. They will need to unzip, than do a save as into their own custom design folder.
To rename a custom design open it in Stella and then do Save As and give it a new name. Afterward you may want to remove the old name as described below.
To remove a custom design delete the .stmx file, the .isdb file if there is one, and any folders that begin with the same name (usually "Custom Design Name_Graphics" and "Custom Design Name_thumbnails" but there may be more). You can also simply move these files and folders to a different location. Once they are no longer in the custom designs folder (even if they are in a subfolder) they will no longer appear as a design option on the Design Selection Dialog.